 Continue with Steam
Good  movement starts with a destination:
 dash toward cover, climb to a useful position, or use a
 zipline to reach your next task. Practice each input on its own before combining them, and keep enough
 stamina to react if a fight starts.
Use the practice area, Sandbox or an empty-map mode to try the drills below without an opponent interrupting you. These are practice exercises, not measured speed tests. For the match context around these choices, see your first match.
Which controls and stamina should you check?
On the usual PC keyboard layout, move with W/A/S/D, jump with Space, dash with Left Shift, and crouch or slide with Left Ctrl. These are defaults, not mandatory keys: check your current bindings in Settings if you changed them or use a controller. Keymap.io’s controls reference and the community movement reference list these defaults. Valve’s game tutorial text uses your bound actions for movement,  jumping, dashing and
 mantling.
Stamina is the movement resource shown near your crosshair. Dashes, air jumps and other movement actions use it, and it replenishes over time. Watch the indicator while you practice: spending everything to travel quickly can leave you unable to dash when someone attacks. Hero  stats and patches can change recovery and costs, so learn the feel of the hero you are using instead of memorizing an old timing chart.
| Action | Input using default PC bindings | Practice check |
|---|---|---|
| Dash |
Hold a direction and press Left Shift | Did you stop at the intended cover? |
| Air jump | Press Space again while airborne | Is there a clear landing and enough stamina? |
| Slide |
Hold Left Ctrl while moving fast or descending a slope | Did the hero slide rather than crouch in place? |
| Dash-jump |
Dash, then press Space during the dash window |
Did you land where you intended? |
| Mantle | Hold Space toward a reachable ledge | Is the top safe before you climb? |
Dash toward a safe destination
A dash is a short burst in the direction you choose. Hold a movement direction and press your dash key. You can also dash while airborne to adjust your route. A dash is useful for avoiding an incoming attack or reaching cover, but it does not automatically make the destination safe.
Drill: Pick two pieces of cover in an empty area. Walk out from the first, aim your movement toward the second, and dash. Stop at the second piece instead of continuing into the open. Repeat in the opposite direction, then practice a sideways dash. Watch the stamina indicator and wait for it to recover between attempts.
If you keep overshooting, choose a closer destination or start the dash earlier.
Save movement for the exit
Before using a dash to approach, choose where you will go if the enemy responds. If spending that dash leaves no movement available, approach more cautiously and allow stamina to recover. Use the dash to reach a useful position, not merely because it is ready.
Jump, mantle and use walls
Press jump to leave the ground; pressing jump again in the air performs an air jump when available. To mantle, move toward a reachable ledge and hold jump as you approach it so your hero climbs up. The game’s tutorial text identifies the jump and hold-to-mantle actions. Check the landing area before climbing into a fight.
Ledge drill: Find a low ledge. Jump toward it and hold jump until you climb up. Walk back down and repeat from a slightly different angle. Next, try an air jump before reaching a higher ledge and watch the stamina you spend. If you fail to climb, move closer or choose a lower ledge; do not assume every surface is reachable.
A wall jump uses jump near a wall to push away from it. Try jumping beside a wall, then pressing jump near it while choosing a direction toward a clear landing. Practice with open space beside the wall before using it in a fight. Wall-jump behavior has changed: Valve’s May 2026 notes describe a stamina-recovery penalty in combat under some conditions. Do not assume repeated wall jumps are free.
How do you slide and dash-jump?
To slide, build movement speed or move down a slope, then hold your crouch key. A slide keeps you low while moving; aim it toward a clear path rather than an unknown corner. If you only crouch in place, begin moving first or try a slope. The community movement reference describes the speed and slope conditions; avoid treating a particular threshold as permanent.
Slide drill: Find a gentle, unobstructed slope. Move down it, hold crouch, and release when you reach a chosen stopping point. Repeat toward a different point. Once this feels comfortable, press jump during a slide and notice where you land. Valve added jumping during a slide in its March 2026 update.
Why am I crouching instead of sliding?
You may not have enough movement speed, or you may be on flat ground. Move toward a clear slope and hold crouch as you go down it. Once that works, try entering a slide after building speed on flat ground; use your own bindings and watch the available space.
Learn the dash-jump
A dash-jump combines a ground dash with a jump during the dash. Start with enough stamina, hold a direction, press dash, then press jump while the dash is still in its input window. Watch for the stamina-bar visual cue described by Mobalytics, and adjust the timing if you get an ordinary dash followed by an ordinary jump. Valve changed that window in its June 2026 update; do not rely on an old frame count.
Dash-jump drill: On flat ground, choose a visible landing point with open space beyond it. Try a ground dash first, then repeat with jump during the dash. Compare where you land and how much stamina remains. Reset and repeat without rushing. Once you can aim the landing, try it toward cover; in a match, use it only when that landing is safer than staying put.
Dash-jump not working? First check that stamina is available and the first dash begins on the ground. Then vary when you press jump during the dash and watch the on-screen cue. If the movement works but you miss the landing, keep the input and change your starting direction instead.
How do you choose a route across the map?
Ziplines provide a fast way to travel along lanes. Approach an accessible line, use the on-screen mount prompt, and choose a safe place to dismount before you reach the enemy. The zipline binding can be changed; Valve’s May 2026 update notes that the binding also applies to ropes. Ropes and jump pads can help you reach other heights or routes, but check where they deliver you before using them under pressure.
Route drill: Start at base, ride toward a lane, and identify a landing spot behind cover. Then walk to a nearby  rope or ramp and use it to reach another level. Return by a different safe route. Repeat until you can name both your destination and the way out before moving. For the decision to leave a lane at all, see rotations.
What if the landing is crowded?
Look for a different landing near cover, or stay on a safe route until you can approach with teammates. If you cannot see a safe landing, do not commit merely to arrive sooner. Recheck the 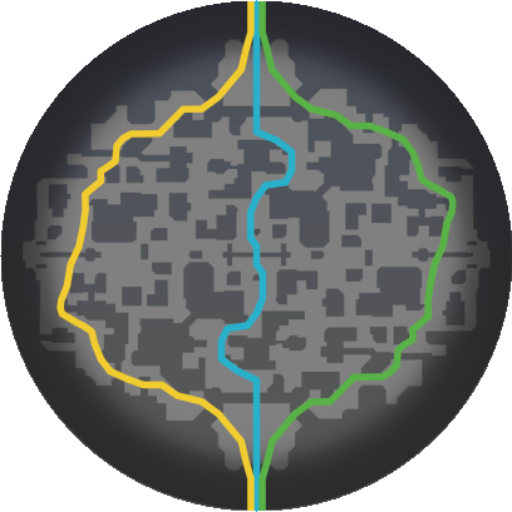 minimap before moving again.
Apply the techniques in three situations
These diagrams are schematic: they show decisions, not exact map geometry.
Escaping: enemy pressure → dash sideways toward cover → break sight → reassess stamina and  health. If the first dash ends in the open, continue toward another safe surface rather than turning back into fire.
Moving between lanes: check map → take a safe zipline or path → dismount near cover → approach the destination on foot. If enemies are missing, leave a movement option available and avoid dropping into a fight without knowing who is there.
Approaching a fight: identify an ally and a retreat route → move to nearby cover → use a short dash only if it improves the angle → stop and reassess. A dash that crosses the fight and leaves you isolated can be worse than arriving a little later.
Start with one drill at a time. In your next match, choose one habit—such as keeping a dash available when crossing open space—and look for a safe opportunity to use it. For positioning and trades during the opening, see the laning guide; for control changes, see settings.