 Continue with Steam
A rotation is a deliberate move from your current area to help somewhere else: protect a teammate, contest a fight, defend a structure or support an objective. Leave when you can arrive while your help still matters, have a useful job on arrival, and the likely gain is worth the farm and pressure you leave behind. If the opportunity is likely to disappear before you get there, stay, defend or take a safer alternative instead.
You do not need an exact travel timer. A nearby ally retreating toward you may still need cover when you arrive; a distant fight already ending may not. Recheck during the trip as circumstances change.
Decide whether to leave
- Name the job. Are you protecting an ally, helping win a fight, stopping a structure attack or supporting an available objective? “There is fighting” is not a job.
- Estimate arrival. Look at your current position, the route you can actually use, possible interruptions and whether you need to clear the lane first. Will you arrive before the ally is eliminated, the target escapes or the objective is already decided? These are estimates, not guarantees.
- Check the ally and yourself. Can your teammate survive or disengage until you arrive? Are you healthy enough and do you have the relevant tools to contribute? An extra body arriving with no way to help may only add another loss.
- Price the departure. Look at the wave and your structure. If enemy
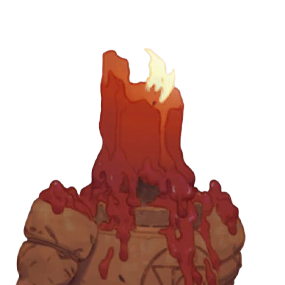 troopers are moving toward an unattended Guardian or
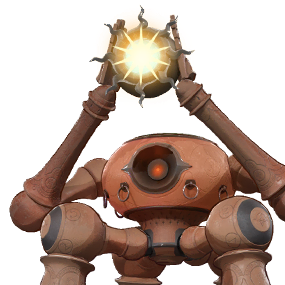 Walker, leaving may cost farm or structure
 health. Is a teammate able and willing to cover it?
- Check information and fallback. Where were enemies last seen, and which are missing? Choose an approach that leaves an exit. Decide where to go if the target disappears or the route becomes unsafe.
Deadlock Atlas similarly weighs a rotation’s purpose against a late arrival and lost wave.
Arrival window check: Can the ally remain safe or the target remain exposed until you arrive? Can you still contribute when you get there? If either answer is unlikely, choose a different job instead of assuming the fight will wait.
| Situation | Choice | Benefit sought | Reassess when |
|---|---|---|---|
| Nearby ally can survive until you arrive | Move with a job | Cover an escape or help a fight | Ally disengages or the route is blocked |
| Distant fight is ending; home structure threatened | Defend | Preserve farm and structure | Lane coverage or a reachable play changes |
| Safe clear and time before a planned play | Clear, then move | Reduce home pressure before leaving | Clearing would make arrival too late |
| Objective available, team not ready | Prepare or defend | Avoid arriving alone | Team readiness or enemy information changes |
Push, clear or leave immediately
Before leaving, ask what the wave is likely to do during your absence. If the enemy wave threatens your structure, a quick safe clear can reduce immediate pressure. If your friendly troopers are advancing, the opponent may need to respond, but they might clear quickly or ignore them. Neither state guarantees you a safe window.
Do not turn wave preparation into an automatic delay. If a nearby ally is about to be caught and you can intervene, completing a perfect push may make your arrival meaningless. Conversely, leaving an unattended structure to chase a fight you cannot reach in time can lose both opportunities. If you cannot safely clear alone, request coverage or accept the cost consciously. For the wave decisions themselves, see when to push or hold.
Compare arrival with the opportunity
The nearest-looking fight is not necessarily the fastest or safest to reach: a detour or exposed route can leave you unable to participate. Consider travel options only if you can use them safely. The community-made Deadlock Moves map groups examples by rotation and shortcut; its videos were not reviewed here and routes can change.
Compare your expected clearing and travel time with the opportunity’s likely duration. If you expect to arrive after the ally must retreat or the enemy can escape, choose another job.
At a safe point along the route, check the target and ally again. If the target has escaped or your ally has already disengaged, stop the trip there; return to the threatened lane, regroup or take another reachable task instead of continuing into danger.
Arrive with a job and an exit
An ally asking for help may need cover to escape rather than a chase. If they are too low to fight, move to support their retreat where possible; do not assume they can turn around and engage with you. If both of you have resources and an opponent remains exposed, coordinate the approach before committing. Ping or communicate your destination, and watch whether the ally responds or changes direction. If you expect to arrive too late, say so and signal a retreat; do not let the ally count on immediate help you cannot provide.
A visible enemy can move; a missing opponent may be anywhere. If your approach loses cover or too many enemies appear, stop short and disengage. Being nearby does not obligate you to enter a lost fight.
Choose a reachable objective, not just a fight
Check that the objective is available and your team can act on it: consider allies, resources, likely enemy response and an exit. If successful, defend, pressure a nearby structure or reset. The objectives guide covers the follow-up choice.
BoostRoom’s objectives guide also recommends checking the wave, enemy positions, team readiness and an exit before a structure attempt. Its map and balance details are dated. If the objective is gone or your team cannot contest, defend, regroup or take another reachable opportunity instead of entering alone.
Should I follow a teammate into a fight I will reach late?
Tell them you cannot arrive in time and suggest a retreat if it is still possible. Defend the threatened lane or move to a safe position that can support their escape; entering an already lost fight alone can add another  death. This may leave your teammate without the help they hoped for, so update the call if the situation changes.
Two hypothetical rotation decisions
These examples are practical hypotheticals, not analyses of recorded matches. Their outcomes are possible, not guaranteed.
A nearby assist that arrives in time
Your wave is moving away from your structure, and a nearby ally is being pressured but still has enough health to retreat. You have a useful ability ready, and the route offers cover. You signal that you are coming and expect to arrive before the opponent can finish the chase. You move directly, help the ally escape, and reassess instead of following the enemy into unseen space. The successful result is the ally’s safe retreat, even without an elimination.
You accepted that some farm might be missed. Afterward, check your wave and whether a teammate covered it. If the ally escapes before you arrive, stop safely and return or take another nearby task.
A late move that costs the lane
Your Guardian is threatened by enemy troopers and the fight across the map is already breaking up. You start traveling anyway; by the time you arrive the opponent has escaped, your allies have reset, and the unattended structure has taken  damage. The mistake was not helping in principle. It was failing to compare the remaining opportunity with the travel and the cost at home.
Instead, defend safely, signal you cannot arrive in time, and look for a reachable play. If a teammate covers the structure and the fight remains actionable, reassess.
Review your prediction against the replay
Pause before a move in your own replay. Record your predicted arrival, the ally’s expected condition when you get there, and the likely farm or structure cost. Then record what actually happened: when you arrived relative to the play, whether the ally could still use help, and what happened to the wave and structure. If the prediction was wrong, identify the earliest information that could have changed your choice to leave, stay or take a safer fallback. Judge it using what was visible at the time, not just the outcome.