 Continue with Steam
In Deadlock’s opening lane, your job is to collect  trooper rewards, stay healthy enough to keep participating, spend
 souls on useful items, and protect your side while looking for safe pressure on the enemy Guardian. You can make progress without forcing an early hero kill.
Think in short cycles: check your position, help with the wave, collect what is safe, then decide whether to trade, shop, heal or stay. The goal is to be ready for the next wave rather than winning every exchange at any cost.
Opening checklist
- Travel to your assigned lane and notice where your teammate is, if one is with you.
- Find cover with a view of the troopers and a route back toward your side.
- Help clear enemy troopers, shoot reachable flying soul orbs and collect your ground pickups when safe.
- Watch your
 health, ammunition and the enemy’s position before stepping out.
- Spend souls when you can safely reach a shop; return to help with the next wave or defense.
For the wider match, see your first match. The details below focus on decisions in the lane itself.
Where should you stand in the lane?
A wave is a group of allied or enemy troopers moving along the lane. Start near enough to participate as enemy troopers fall, with cover between you and the enemy heroes. Look for a position where you can see the wave, step out briefly to shoot, and step back without crossing a long open area. Your own troopers can provide information and pressure, but they do not make you invulnerable.
Before moving forward for a pickup, check whether the enemy can see you and whether your teammate is close enough to help. If you are low on health, move closer to your side and look for a safer angle. If the enemy is absent or occupied, you may be able to move farther forward, but keep an exit route in mind. Check the 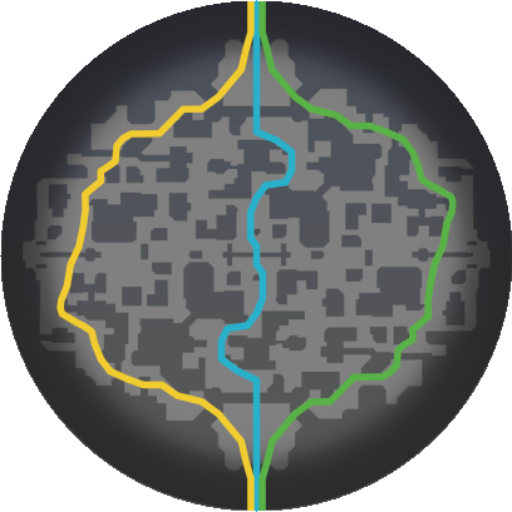 minimap when opponents disappear from view; a missing marker is a reason to be cautious, not proof that a particular ambush is coming.
Collect souls without chasing every orb
You do not have to personally land the final hit on every enemy trooper. Valve removed that requirement for nearby players in its map rework, and later referred to the change in its shop update. Stay near the wave and focus on the rewards you can collect.
Shoot your team’s flying orb to secure it; shooting an opponent’s flying orb first can deny them that reward. Move near your team’s ground pickup when it is safe. Valve describes these separate rewards in the November 2025 update. Keep ammunition ready as troopers fall, but do not cross exposed ground for every pickup while the enemy is aiming at you. The souls guide explains the economy and collection rules in detail.
Practical example: a ground pickup lands in the open and both opponents can shoot you. Secure a flying orb from cover if you have a clear shot; wait for a safer opening for the ground pickup. If the threat remains, let it go and prepare for the next wave. The aim is to avoid turning one missed pickup into a  death and several missed opportunities.
When should you trade damage?
A trade is a brief exchange of  damage with an enemy hero. A useful trade might force an opponent away from a pickup, give your teammate room to clear troopers, or make the enemy use an ability. Before stepping out, check your health, your escape route and whether your own useful
 abilities are available. If your teammate is nearby, attack the same exposed opponent when it is safe to do so, then return to cover together.
Keep the exchange short when you do not know what the enemy can do. If they use a dangerous ability and miss, you may have a window to shoot or collect; if your own health falls quickly, break sight and reassess. Avoid chasing an opponent past your cover while troopers and another enemy remain active. A trade that leaves you too low to collect the next wave may not have helped even if you dealt damage.
Practical example: your teammate draws an opponent’s attention while a wave meets in front of you. Step out from a different angle, fire a few shots, and return to cover if the opponent turns toward you. If your teammate retreats, do not remain in the open trying to finish the enemy alone.
What if I keep losing trades?
Shorten the exchange or skip it for a wave. Stay close to cover, take reachable rewards and use the next safe shop visit to address the damage you are taking. Ask your partner for help if you cannot safely step forward; do not force the same duel simply to recover lost health through damage.
Buy, heal and return safely
Use a pause in pressure to spend souls on an item that addresses the problem you face. If repeated damage forces you away from the wave, look for a suitable survivability or recovery option in your hero’s suggested build. If staying alive is manageable but you cannot contribute damage, consider an option that fits your weapon or abilities. Read the effect before buying; the shop guide covers the interface.
Before leaving for a shop or to heal, glance at the approaching wave and your lane partner. If your partner is holding the lane, a brief call or ping can make your absence clear. Shop when you have a safe opportunity, then return by a route that avoids exposed enemies. If you must go back to base, use the available transit route when safe and check the minimap before dropping back into danger. Do not remain at critical health simply to avoid missing one wave.
Valve’s City Never Sleeps update describes changes to the shop and interface; check the current in-game descriptions rather than relying on an old price or fixed opening build.
Returning after healing
Before re-entering, check the minimap and where the wave is meeting. Approach from your side with cover available; if enemies are already attacking your position, wait for an ally or choose an angle that lets you help without landing among them. Once you are safe, rejoin the wave and reassess the shop and your health.
What should you do when the lane is under pressure?
If opponents repeatedly drive you out of the open, reduce the distance you have to cross. Use cover closer to your side, collect the rewards you can reach, and avoid a long duel while your health is low. Ask your teammate for help or tell them you need to heal. A defensive purchase may let you participate again, but it cannot replace a safer position.
| Situation | First action | Reassess when |
|---|---|---|
| Healthy, teammate nearby, enemy backs away | Collect reachable rewards and apply safe pressure | Defenders return or your exit is threatened |
| Low health, enemy aiming at your route |
Break sight and move toward a safer  healing or shop route |
You have health and a safe way back |
| Partner away, opponents close | Stay near cover and collect only safe rewards | Support returns or opponents move away |
| Enemy wave threatens your Guardian | Help clear from a defensible angle or request help | Your health or enemy numbers make the position unsafe |
Forced away repeatedly? Check the last attempt: did you step out without cover, spend your escape  movement, start the exchange low on health, or reload while the wave fell? Change one of those conditions before trying the same position again.
Your partner is away
For example, your partner goes to heal while two opponents remain. Step toward cover on your side, collect what you can reach, and signal if the Guardian is threatened. Give up an exposed orb if necessary; return to a forward position only when you have a safe opening or support.
Losing a Guardian is a setback, not a reason to run back into the same fight repeatedly.
Use an opening without overcommitting
When your wave advances and opponents are occupied or have retreated, you may be able to damage the enemy Guardian with your teammate. Check your health and watch for defenders. Leave when the situation changes or your safe exit is threatened; a little pressure followed by a safe return can be more useful than dying while trying to finish the structure.
If an opponent leaves your lane, communicate it and check the map. A teammate in immediate danger may need help, but following without a purpose can cost a wave and leave your defense unattended. More detailed decisions about controlling waves belong in the wave management guide, and deliberate moves between lanes in the rotations guide.
After the match, review one moment when you lost health or missed a wave. Identify the decision just before it: did you leave cover, chase too far, run out of ammunition, or delay a needed purchase? Pick one adjustment to practice next game.