 Continue with Steam
 Haze wins fights by approaching from a useful angle, keeping her gun on a target, and leaving before the enemy can turn the exchange around. Farm and contest the map between fights, but do not wait for a perfect late-game build: a safe rotation and a teammate’s follow-up can create an opportunity earlier.
Use this as a decision guide, not a fixed purchase order. Haze’s hero database and community builds provide a place to check  abilities and compare recent build choices. The mechanics and item examples below use the community-maintained game asset snapshot captured October 28, 2026; check the in-game descriptions when you play. Valve’s Deadlock news is the source for official announcements.
Abilities and upgrade priorities
Haze’s standard ability set is  Sleep Dagger,
 Smoke Bomb,
 Fixation and
 Bullet Dance. The community asset data associates these abilities with Haze; the recommendations below are practical choices, not a proven universal order.
- Sleep Dagger: damages and sleeps its target. A damaged sleeping target wakes shortly afterward. Throwing it does not break Haze’s invisibility, but it does not interrupt channeling abilities. Use the sleep to line up shots, escape or coordinate an ally’s attack; do not rely on it to stop a channel. Its upgrades add a bullet-resistance reduction on wake-up, then longer sleep and Fixation stacks, and later a shorter cooldown and a
 movement slow on wake-up.
- Smoke Bomb: makes Haze invisible and increases sprint speed after she fades. Attacking ends the invisibility; using items does not. Close enemies can see through it, so smoke is an approach and repositioning tool, not guaranteed protection. Later upgrades provide two
 charges and, at the final tier, a dispel of non-ultimate debuffs and temporary
 bullet lifesteal.
- Fixation: each bullet hit increases Haze’s
 bullet damage against that target; headshots add three stacks rather than one, a change also recorded in Valve’s September 16 update. Early upgrades add periodic
 spirit damage and a slow, and increase the
 stack limit and duration. It rewards landing sustained shots, so do not chase an unreachable target just to preserve pressure.
- Bullet Dance: fires Haze’s weapon at nearby enemies with perfect accuracy and added bullet damage. Higher upgrades add
 fire rate and
 movement speed, then evasion and a shorter cooldown. It is not blanket
 damage immunity; wait for a credible opening and a way out.
For a starting priority, invest in Fixation when you can consistently hold a target in sight. Take Sleep Dagger upgrades when your team can follow up or you need more frequent setups; consider Smoke Bomb charges when rotations and escapes matter more. Upgrade Bullet Dance when you expect to use it in contested fights. Read the next upgrade before spending points: the right choice depends on whether damage, control or access is currently limiting you.
Check the entry before committing
Before entering, check three things: Can you reach a target without being seen at close range? Is a dangerous control ability ready? Where will you retreat if the first target survives? If you cannot answer the last question, wait or take a safer angle.
Combos you can actually use
A safe solo pick
- Approach from cover with Smoke Bomb and identify a target without an obvious nearby rescue.
- Throw Sleep Dagger while invisible, then move into a position with a clear escape route.
- Coordinate with an ally or start firing yourself; a damaged target wakes shortly afterward, so be ready for their response.
- Keep landing shots while it is safe. If the target reaches cover or teammates arrive, disengage instead of chasing through the team.
A missed dagger is a reason to reconsider the fight, not an instruction to commit anyway. The sleep can create time for setup but does not guarantee a kill.
A contested teamfight
Wait until your team has made contact and you can see a vulnerable target or an enemy control ability has been used. Approach from a side angle, fire when you have a clear line, and use Bullet Dance when nearby enemies and your own  health make the commitment worthwhile. If the fight moves away or an enemy can stop you, keep your distance and shoot or reset instead. The ultimate can still be worth using on one important target; judge the opportunity rather than counting enemies alone.
When should you spend Bullet Dance?
Should I save Bullet Dance for several enemies? Not automatically. One high-value target can justify the cooldown if securing that pick helps your team and you can survive the commitment. Hold it when the target can escape or the enemy has an immediate answer.
Game plan by match stage
Lane: secure souls and protect health
Prioritize last hits and soul confirms, use cover between shots, and keep enough  stamina to retreat. Trade when the opponent must expose themselves for a last hit, rather than standing in the open for a long spray. Sleep can buy room to leave or set up a teammate; do not expect it to cancel a channel. If chip damage is forcing you away from the wave, buy survivability before a speculative damage upgrade.
Mid game: turn movement into a purpose
Push a safe wave, then choose a nearby camp, an exposed opponent, or an objective where an ally is already able to help. Watch the  minimap before crossing into unobserved territory. A rotation that finds nothing still has a cost: if the target has retreated, return to a safe source of
 souls rather than circling invisibly for too long. When behind, defend accessible waves and group around a teammate rather than farming deep alone. See playing from behind.
When a rotation finds nothing
For example, if you leave a safe wave to approach an isolated enemy and they retreat before you arrive, stop the pursuit and return to a safe wave or regroup. The time spent searching also costs farm; assess the map before continuing.
Late game: choose your entry and exit
Before a major fight, identify the enemy most able to interrupt or burst you and where you can retreat. Let allies reveal positions, then take a side angle that gives your gun access to a target. Use the ultimate when the window is real; save it when walking into the center would expose you to several prepared opponents. After a successful pick, help the team convert the numbers advantage into an objective instead of pursuing another isolated kill.
Item choices: buy for the problem in front of you
The following examples are conditional options, not a recommended full build. Item effects and names come from the October 28 community asset data; the shop can change.
| Situation | Example | Reason and tradeoff |
|---|---|---|
| You can safely land repeated shots |  Rapid Rounds or  Swift Striker |
Consider more weapon tempo, but health or movement may matter more if you cannot stay in range. |
| Lane trades leave you low |  Extra Health or  Healing Rite |
Health helps absorb pressure; Healing Rite provides regeneration but ends when enemy players or objectives damage you. Find cover first. |
| Spirit burst wins the trade before you can fire |  Spirit Shielding |
Its barrier triggers after significant spirit damage from enemy heroes in a short time; buy for that threat rather than every matchup. |
| A mobile opponent keeps escaping |  Slowing Hex |
Slows and silences movement-based abilities and items. It needs an active cast; use it on a valuable escape target, not automatically on the first enemy. |
| Enemies group and you have time to shoot |  Ricochet |
Bullets bounce to nearby enemies and apply bullet procs. It is a significant investment; buy earlier defenses if you cannot survive the engage. |
| Control repeatedly stops your entry |  Unstoppable |
Temporarily suppresses negative effects and prevents listed controls. Activate before the threatening control; it cannot be used while stunned or slept. |
If bullet resistance is the obstacle, 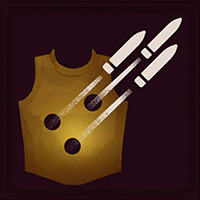 Armor Piercer is another late option: its bullets can pierce and ignore bullet resistance. Compare its cost with the defensive item you would delay. When your slots are full, replace the item whose job matters least in the next fight, rather than selling a defensive answer just to fit more damage. Check the current shop sell value before buying its replacement. Consult adapting builds for the general purchase process and the current shop for exact costs.
Difficult matchups and common mistakes
Burst and hard control: Against heroes such as  Bebop or
 Mo & Krill, respect the range and availability of their initiation. Stay behind cover, let an ally draw attention, and avoid committing Smoke Bomb and your escape route at once. Sleep Dagger will not stop a channel; if a channel is already under way, seek cover or use a different available answer.
Mobile targets: Against a hero who can quickly leave your angle, such as  Vindicta or
 Lash, wait until their movement is committed or use a relevant control item. If they escape, take the safe wave or regroup rather than spending every cooldown on pursuit. These are matchup patterns, not a claim that a particular hero always counters Haze.
Diagnose the failed fight
| What went wrong | Likely decision to reconsider | Next attempt |
|---|---|---|
| You were stopped before dealing damage |
Entered into ready control | Wait for it to be used or consider Unstoppable before entry. |
| Target escaped behind cover | Started too far away or chased too long | Take a closer safe angle; disengage when the route closes. |
| You lost health before firing |
Exposed yourself on approach | Use cover and consider a defensive purchase for the damage type. |
After a failed fight, identify the first constraint—health, control, access or sustained damage—and change one decision on the next attempt. A different item cannot fix an entry with no escape route.