 Continue with Steam
After a won fight, choose the strongest action your surviving team can actually reach and complete before the enemy can respond. That may be a nearby structure, a major objective, a wave, a safe reset or available farm. A kill creates an opportunity; the wave, your resources and the opponents’ return decide what you can turn it into.
Make the next call before chasing
Use this short sequence as the fight ends:
- Count who can act. Which teammates survived, where are they, and do they have enough
 health, ammunition and
 abilities to continue? A fight won by two low-health players creates a different window from one won by a healthy group.
- Check the enemy’s return. Look at the scoreboard and map. Dead enemies can respawn and travel back; enemies who escaped may already be near the target. Estimate the whole window, including your own travel, the action and your exit—not just the remaining respawn timer.
- Find a reachable target. Look for a nearby vulnerable structure, a wave needing attention or an available major objective. If the team is already beside a target, that can matter more than a theoretically valuable target across the map.
- Check the wave and protection. Can your
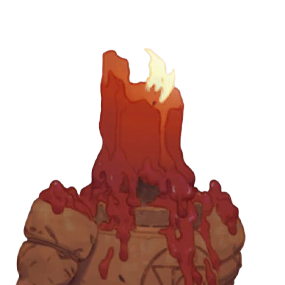 troopers reach the structure, or is it marked Protected? Do not assume that winning a fight removed the structure’s protection. If a wave is far behind, pushing it can be the practical next step rather than attacking a resistant target alone.
- Name a stop condition. If opponents return, your wave dies, or your team loses the resources to finish safely, disengage or switch to defense. Do not turn a won fight into a second, unfavorable one simply because the first went well.
Before committing: Can the survivors travel to the target, complete the action and leave or hold against returning defenders? If any part is unlikely, pick a closer action or reset. Recheck the wave and enemy positions as you move.
Make one concise call: “Clear this wave, then hit the  Walker,” or “We are too low; defend and reset.” An agreed small gain is often more practical than teammates starting several distant plans at once.
Check whether the structure is actually available
A structure’s position and protection determine whether a push is feasible. The community backdoor-protection reference describes the Protected indicator and the role of trooper pressure. Bring the wave forward where appropriate and check the structure’s actual status rather than assuming every building is equally vulnerable.
Base progress also has a hard gate: Valve’s May 22, 2026 update made Shrines invulnerable until one pair of  Base Guardians has been destroyed. Both Shrines must fall before the
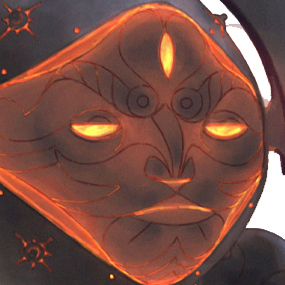 Patron can be damaged, according to the Shrine reference. If the next target is locked, use the window for the prerequisite, wave pressure or another realistic objective instead of shooting an invulnerable
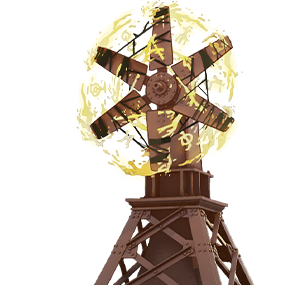 Shrine.
For the basic structure sequence, see the objectives overview. The rest of this guide focuses on choosing what to do with the window you just earned.
Compare the available actions
| Situation after the fight | Action to consider | Why it fits | When to stop or choose differently |
|---|---|---|---|
| Survivors are near a vulnerable structure with a wave arriving | Take the structure together | Travel is short and your team can apply the advantage immediately. | Defenders return, the wave disappears, or the team cannot survive the structure and a contest. |
| The structure is protected or the wave is behind | Push the wave toward it | The wave creates pressure and may open a better attack window. | An enemy can reach and punish the push before your team is ready. |
Your team is near  Mid Boss, healthy and able to cover approaches |
Consider Mid Boss and its crystal |
A favorable fight can provide time to attempt both stages. | A threatened lane is uncovered or enemies can arrive before the crystal is secured. |
The  Urn or Rift is available and the route is controlled |
Consider the nearby objective | It can offer a useful reward during the window. | The team would abandon a more urgent defense or cannot safely finish the objective. |
| Survivors are scattered, low or far from an actionable target | Defend, collect safe farm or reset | Preserves the advantage and prepares for the next commitment. | A nearby target becomes available and the group can take it safely. |
These are comparisons, not a fixed priority order. A safe wave or reset can be the best conversion when a structure or major objective cannot be reached in time.
How much of the window remains?
| Same fight, different survivors | Reasonable first action | What would change the call? |
|---|---|---|
| Healthy group beside a vulnerable structure and wave | Push the nearby structure. | Defenders return or the wave is lost. |
| Scattered, low-health survivors far from a target |
Clear a safe wave, regroup or reset. | A safe nearby objective becomes available. |
Four example decisions
When a structure is close
Illustrative situation: your team wins near an enemy Walker. Several survivors are healthy, a friendly wave is approaching, and the defeated opponents have not yet returned. Group on the nearby structure while someone watches for the returning defenders. If the wave is delayed or the Walker remains Protected, clear the opposing wave and reassess instead of staying exposed for an uncertain finish.
Once the structure falls, look again at the map. If your team is low and opponents are returning, leave and spend or defend. Do not automatically continue into the base because the first target was taken.
Should we always take the highest-value objective after a won fight? No. A target your survivors cannot reach and complete before a response may cost the advantage. Compare it with a nearby structure, wave, defense or reset that the team can actually carry out.
When Mid Boss is reachable
Illustrative situation: the fight ends near Mid Boss, your team has enough health and  damage, and no friendly structure needs immediate defense. The boss may be reasonable if your team can watch the approaches and remain for the crystal. Killing the boss and claiming the
 Rejuvenator are separate steps; either team can contest the landed crystal for shared revive credits. See the Mid Boss guide and the current Rejuvenator reference.
If the boss takes longer than expected or enemies are returning before the crystal can be secured, stop and reconsider. If your group cannot protect the crystal claimer or secure an exit before enemies arrive, call a retreat. A nearby lane or reset can be a better use of the remaining window than a contested pit.
When survivors need to reset
Illustrative situation: your side wins, but only a few low-health allies remain and the next structure is far away. Clear the closest safe threatening wave, take nearby safe farm if it does not delay defense, or regroup and shop. This converts the fight into a stable map and a better next purchase without assuming a long walk ends in an objective.
If an ally can keep a wave moving while others reset, coordinate that responsibility. Do not send one vulnerable player alone into an enemy return merely because the rest of the team won the previous fight.
A neutral objective is available
Illustrative situation: the Urn is available near the survivors, lanes are covered and the team has a plausible route and escort. Running it can be reasonable, but it is a separate objective from the  Unstable Rift; the June 30 update changed their relationship. Compare that commitment with a nearby structure or necessary defense. If the carrier and escorts would leave a threatened lane uncovered, stabilize it or choose a different action. The Urn guide covers the carry and contest decisions.
Review whether the call was achievable
After the next encounter, ask: did everyone reach the intended target together? Was the wave in place? Did an enemy return sooner than expected, or did low health and cooldowns prevent the team from finishing? If the call failed, identify the earliest constraint and choose a closer or safer action next time.
Compare the outcome with what the team could actually reach and complete during that window.