 Continue with Steam
An initiator creates an opening that teammates can use: catching an exposed enemy, interrupting an approach, or forcing opponents away from a contested area. A good initiation is not simply the first ability cast. It has a reachable target, allies who can follow, and a plan for what happens if the enemy responds.
Starting contact and holding the front line are related jobs, but they are not identical. One player may initiate and then protect a teammate or retreat; another may hold space without diving. Your hero and build affect which action is realistic. See the roles overview for how the responsibilities overlap.
Check the opening before you commit
Use this quick check as you approach a fight:
- Purpose: What will the team gain—protecting an ally, stopping a push, or creating room for an objective?
- Follow-up: Can your allies see and reach the intended target? Are they moving toward the fight or away from it?
- Readiness: Is your opening tool available, and do you have enough
 health and resources to withstand the response? Are the allies you need ready to act?
- Enemy answers: Which visible opponent can interrupt, protect the target, or punish your landing? If you have not seen a defensive tool used, treat it as potentially available.
- Approach and exit: Can you reach the target without crossing a route the enemy controls? Where will you go if the opening misses or your team cannot follow?
This is a fast judgment, not a requirement to know every cooldown or wait for a perfect fight. The Deadlock Atlas preparation guide similarly recommends defining the immediate objective, threat and position; its advice is editorial, not an automatic rule for every fight.
Decide whether to go, wait, or reset
| State | Next action | Recheck |
|---|---|---|
| Ally can follow and target is reachable | Commit to the identified opening. | Did the target or ally move before contact? |
| Follow-up or enemy response is uncertain | Hold a useful angle and seek information. | Can you protect an ally while waiting? |
| Target escapes or allies retreat | Stop the chase and move toward safety. | Can the remaining team still defend? |
Choose a target, name the ally who can follow, and identify a route out. If any part changes before contact, reconsider the engage.
Choose a target your team can punish
The most valuable enemy on paper is not always the best target. An isolated opponent near your teammates may be more practical than a fragile enemy behind the entire opposing team. Check whether your control will leave the target in an area your allies can actually reach. A catch that moves someone away from your allies can make the follow-up harder.
| Situation | Opening to consider | Stop or change the plan when |
|---|---|---|
| An enemy steps forward near your team | Catch that opponent while allies are in reach. | They retreat to safety before your team can follow. |
| Several enemies group on a contested route | Use an area opening if you can reach them safely and allies are ready. | Your landing is isolated or an unseen enemy can punish it. |
An enemy dives your  damage dealer |
Turn your control on the diver and protect the ally. | Chasing the diver would leave your team exposed elsewhere. |
| Your team is retreating or scattered | Cover the exit or regroup. | A solo initiation would turn their retreat into another loss. |
A single-target catch can be enough. If it removes a threat from an objective fight or lets your team push safely, it does not need to hit multiple enemies. Conversely, reaching several opponents with an ability is not automatically a success if your allies cannot capitalize or you cannot survive the response.
One target or a group?
Catching one opponent near your team can be more useful than diving a group beyond their reach. Choose the group opening only when allies can use it and your landing has a plausible escape or protection.
Approach without giving away the plan
Move toward a useful angle while remaining close enough to your team. Cover can reduce exposure, but a long flank that leaves allies unable to assist may make your opening less useful. If the target is behind terrain, plan where they will end up and whether your teammates have a sightline after you engage.
Signal your intention before committing when possible: ping the target or communicate the route you want to contest. A ping is not confirmation; watch whether allies move toward the target. If allies are  healing, farming elsewhere, or backing away, wait or select a defensive job rather than assuming they will arrive.
Abrams: use the wall and check the follow-up
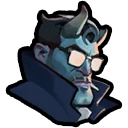 Abrams’
 Shoulder Charge pulls enemies he hits, and pushing an enemy hero into a wall applies a stun, according to the community hero data and ability data snapshots captured October 28, 2026. These are community-maintained game data, not official Valve documentation.
For example, an opponent approaches a wall near your team. Check that allies can reach the landing area and that charging toward the wall does not carry you into the rest of the enemy team. If the path is clear and the target remains reachable, a wall catch can create a window for follow-up. If the opponent moves away or your allies are retreating, do not assume the stun will happen: hold the charge, protect the retreat, or choose another opening. The Abrams guide covers his kit beyond this example.
Recognize a fake opening
A low-health enemy alone on screen may be bait if nearby opponents are missing or your own team cannot reach them. A group that looks vulnerable may have a defensive answer ready. These possibilities do not prove a trap; they are reasons to gather more information before committing your only escape or major control.
Look at the map, the direction allies are moving, and whether the intended target has a safe route out. If you cannot see the response, approach from cover and be ready to stop. Do not spend your escape just to test the enemy.
Choose an abort trigger
Decide in advance what changes your plan: an ally retreating, the target moving behind cover, or a defender appearing on your route. Stop or switch to protection when that condition occurs.
Waiting also has a cost. If an ally is already threatened or an objective is being lost, decide whether you can protect them from a reachable position instead of searching for a flawless engage. A useful defensive interruption can be better than arriving late for a larger play.
If the initiation fails, change the job
If your control misses, the target escapes, or your allies cannot follow, do not automatically spend every remaining ability to rescue the original plan. Move toward cover or teammates if possible, use a remaining tool to slow pursuit or protect an ally, and reassess whether the fight is still favorable. If the enemy has committed to you, your allies may be able to respond—but that is a new situation to judge, not a reason to stay indefinitely.
When the opening works, check what your team can do next. Continue controlling a nearby threat, protect the ally dealing damage, or help pressure an objective. If your team is too low or enemies return, a safe reset can be more valuable than chasing another elimination. The objective conversion guide covers how to choose the next play.
Two decisions after contact
Once the target is controlled, check whether allies have the damage and position to finish. If they do, protect their firing or casting space; if not, avoid chasing and move with them toward the objective or safety.
Must I always start the fight? No. If an enemy threatens your ally, using control defensively can create the better opening.
What if my team does not follow? Move toward cover or teammates when possible. Next time, signal earlier and pick a target they can actually reach; a ping alone is not confirmation.
Review the decision after the fight
Look beyond whether the ability hit. Ask whether allies were in range, whether the target could escape, and whether you kept an exit. If a catch landed but nobody could follow, choose a closer target or communicate earlier next time. If you were interrupted before reaching the target, identify the opponent or route that stopped you and adjust your approach.
For positioning and follow-up beyond the first contact, see the team-fight guide.